Flower Arranging for Beginners: Easy Techniques for Stunning Bouquets
Learn flower arranging for beginners with simple tools, easy design rules and step by step methods for a vase arrangement and a hand-tied spiral bouquet. Plus seasonal flower ideas and care tips that keep blooms fresh longer.
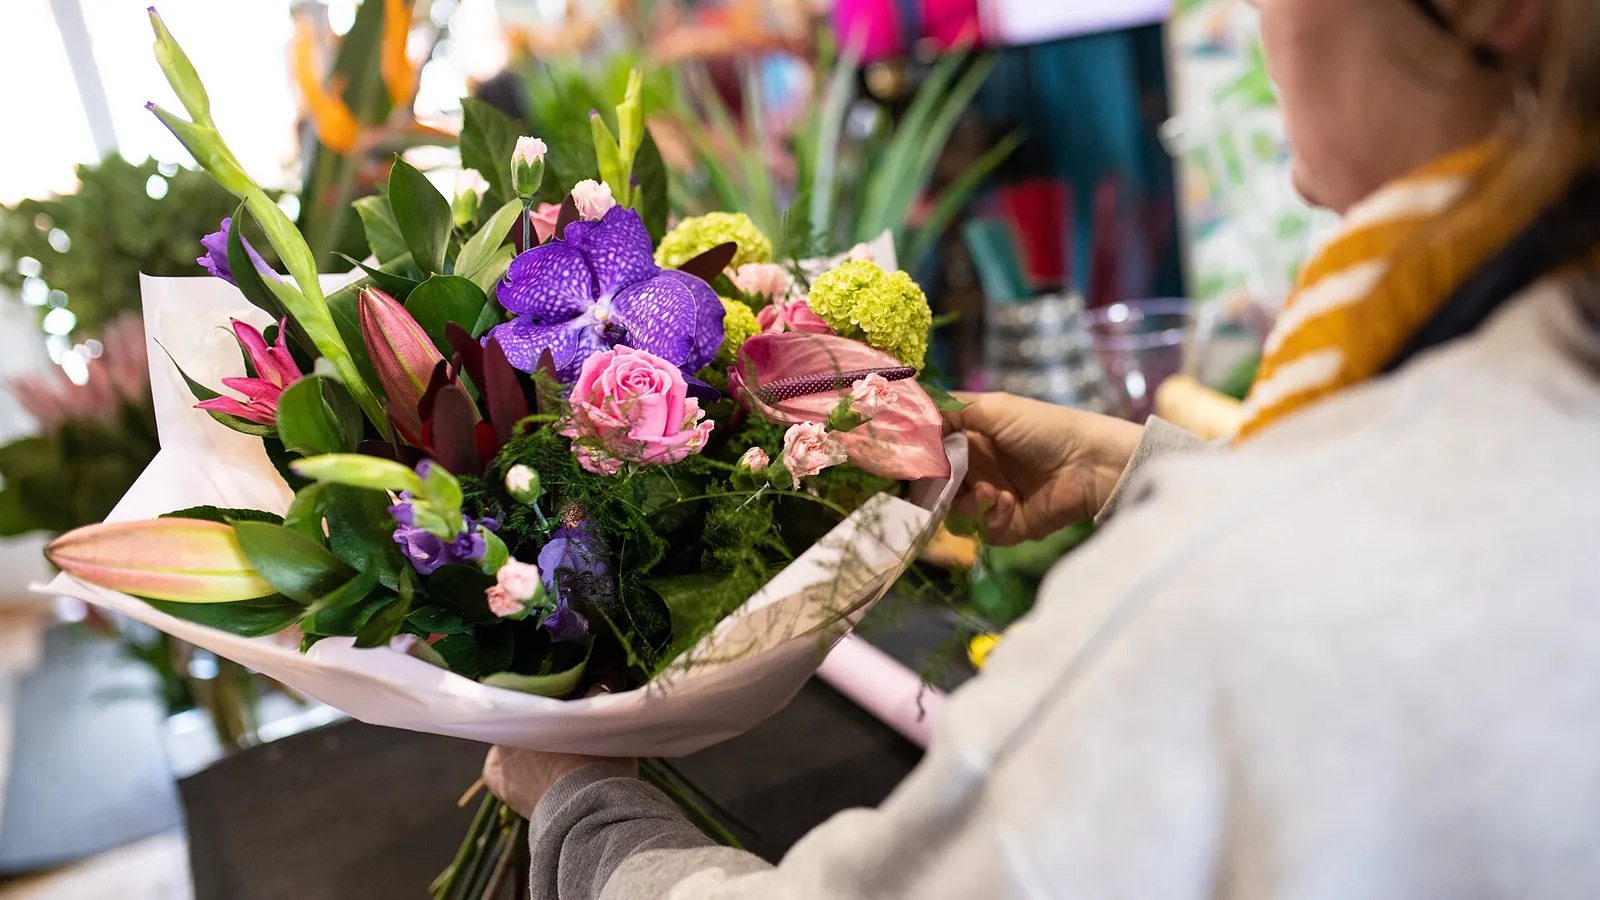
Flower arranging for beginners comes down to three habits. First, condition your flowers: cut stems at an angle, strip leaves below the waterline and let them drink for a few hours. Next, build in layers: greenery, then line flowers, then focal blooms in odd numbers, then filler. Finally, keep the design about 1.5 to 2 times the vase height and change the water often.
What Makes a Flower Arrangement Look Good?
A good arrangement looks relaxed, but it follows a few simple rules. The flowers are fresh and fully hydrated. The size suits the vase. The colors work together, and there is a clear center of interest that pulls the eye in.
None of this needs florist training. Most of the skill is in the prep work and in placing stems in the right order. Once you learn the steps, you can make a bouquet from grocery store flowers, a farmers market bunch or stems from your own garden.
This guide walks you through the tools, the design basics and two beginner projects: a classic vase arrangement and a hand-tied spiral bouquet. If you want to grow your own stems, our guide to planning a cut flower garden covers what to plant and when to harvest.
Key takeaways
- Condition flowers before arranging: recut stems at an angle, remove leaves below the waterline and let them drink for several hours.
- Build in layers: greenery first, then line flowers, focal flowers and filler.
- Use odd numbers of focal blooms, such as 3 or 5, and place them at slightly different heights.
- A good rule of thumb is a design about 1.5 to 2 times the height of the vase.
- Skip floral foam. A flower frog, chicken wire, a tape grid or criss-crossed greenery will hold stems instead.
- Clean vases, flower food, fresh water and a cool spot away from ripening fruit make flowers last longer.

Flower Arranging Tools and Supplies
You do not need much to start. A few basic tools make the job cleaner and help your flowers last longer.
The Basic Kit
- Sharp, clean cutters: floral snips, bypass pruners or a sharp knife. Dull blades crush stems and slow water uptake.
- A clean vase or two: start with a medium vase with a slightly narrow neck. It holds stems upright with little help.
- A bucket: for conditioning flowers in water before you arrange them.
- Flower food: the packets that come with store-bought flowers, or a commercial product.
- Twine, raffia or floral tape: for tying bouquets and making a tape grid.
- A towel and a clear work surface: stripping leaves is messy work.
Why Many Florists Avoid Floral Foam
Green floral foam was a florist staple for decades, but many designers now skip it. The foam is a plastic product, and it crumbles into tiny particles. A study led by RMIT University found that floral foam breaks down into microplastics that freshwater and marine animals ate in lab tests. The researchers also found that chemicals leaching from the foam were toxic to the aquatic animals they tested.
Foam also hides a care problem. Mississippi State University Extension notes that dirty soaking water can grow microbes that block stems and shorten vase life. For home arranging, foam-free mechanics are easier, cheaper and reusable.
Foam-Free Mechanics: Frogs, Chicken Wire and Tape Grids

Mechanics are anything that holds stems in place. Pick one based on your vase.
- Pin frog (kenzan): a heavy base covered in sharp metal pins. It sits in the bottom of a shallow bowl or low vase, and you press each stem onto the pins. It comes from Japanese ikebana and is ideal for low, airy designs.
- Cage or hairpin frogs: metal or glass frogs with holes or loops. They work well for thicker stems and in opaque vases.
- Chicken wire: crumple a piece of wire into a loose ball or pillow so stems pass through two layers, then push it into the vase. Mississippi State University Extension recommends two distinct layers and notes that wire can rust and stain glass, so use it in opaque containers.
- Tape grid: run strips of clear waterproof floral tape across the mouth of a dry vase in a tic-tac-toe pattern. Each square holds a few stems upright. This is the easiest option for clear glass vases.
- A greenery grid: criss-cross sturdy foliage stems in the vase first. The stems lock together and support the flowers you add later.
How to Condition Flowers Before Arranging

Conditioning means giving flowers a long drink before you arrange them. It is the single biggest step toward a bouquet that lasts. Skip it, and even the best design will droop in a day or two.
Cut Stems at an Angle
Use a sharp, clean blade and cut about half an inch off each stem. Penn State Extension notes that stems are cut on a slant so they can take in the most water. An angled cut also stops the stem from sitting flat on the bottom of the vase. If you can, cut stems under running water or in a bowl of water so air bubbles do not block the stem.
Strip Leaves Below the Waterline
Remove every leaf that would sit underwater in the vase. Leaves rot quickly in water and feed bacteria, which clog the stems. University of Illinois Extension and Penn State Extension both list this as a core step. Also pull off thorns, small side shoots and damaged petals.
Give Them a Long Drink
Place the stems in a clean bucket of water right away. Penn State Extension advises lukewarm water for most flowers, then a few hours or overnight in a cool room. Washington State University Extension suggests starting with warm water around 110°F and letting it cool on its own, because warm water moves into stems quickly.
Special Cases
- Woody stems such as lilac and mock orange: make a short vertical slit up the stem end with your pruners to open up more surface for water.
- Milky sap from poppies and poinsettias: Penn State Extension recommends dipping the stem end in boiling water for about 10 seconds or searing it over a flame.
- Daffodils: their sap can shorten the life of other flowers. WSU Extension advises keeping them in their own water for 24 hours, then rinsing the stems before mixing them with tulips or other blooms.
- Tulips: they keep growing and bending toward light in the vase. Leave the wrapper on during conditioning so the stems firm up straight.
Flower Design Principles for Beginners

Every arrangement is built from a few types of material. Once you can spot them, a bucket of mixed flowers turns into a simple plan.
Focal, Filler, Line and Greenery
| Role | What it does | Easy examples |
|---|---|---|
| Focal flowers | Large, eye-catching blooms that anchor the design | Roses, peonies, dahlias, lilies, sunflowers |
| Line flowers | Tall spikes that set the height and outline | Snapdragons, larkspur, delphinium, gladiolus, stock |
| Filler flowers | Small blooms that fill gaps and add texture | Baby’s breath, waxflower, spray roses, feverfew, solidago |
| Greenery | Foliage that forms the base and supports stems | Eucalyptus, pittosporum, ruscus, salal, herbs |
West Virginia University Extension also names accent or button flowers, such as zinnias and mums, and delicate detail flowers, such as sweet peas and cosmos, that go in last. You do not need all of these in one vase. A simple design can use just one focal flower, one filler and some greenery.
Use Odd Numbers
Odd groupings look more natural than even ones. WVU Extension advises using at least three of each flower and odd numbers of flowers and flower types. Three focal roses look balanced. Two or four tend to look stiff and paired.
Get the Proportion Right
A common rule of thumb is to make the arrangement about 1.5 to 2 times the height of the vase. WVU Extension puts it another way: the container is about one-third of the total height and the flowers are about two-thirds. Tall vases suit tall designs, and short, wide bowls suit low, spreading ones.
Measure before you cut. Hold a stem against the vase, decide where it should end and trim a little longer than you think. You can always cut more, but you cannot add length back.
Choose a Color Scheme
Color is where an arrangement gets its mood. Pick one of these simple schemes to start:
- Monochromatic: shades of one color, such as blush, rose and deep pink. Our guide to pink flowers is full of options.
- Analogous: neighbors on the color wheel, such as yellow, orange and red. This looks warm and easy.
- Complementary: opposites, such as purple and yellow or blue and orange. This is bold and lively.
- All white and green: calm, classic and very forgiving. Browse our list of white flowers for ideas.
WVU Extension notes that warm colors such as red, orange and yellow seem to come forward, while cool colors such as blue, green and violet seem to recede. Put warm, bright focal flowers near the center and cooler tones toward the edges for depth.
How to Make a Vase Arrangement Step by Step
This is the classic beginner project. You need conditioned flowers, a clean vase, sharp snips and water mixed with flower food.
- Prepare the vase. Wash it with hot, soapy water. Fill it about three-quarters full with cool water and flower food. Add a tape grid or frog if you are using one.
- Add the greenery. Criss-cross foliage stems around the rim and through the center. This forms the base and hides the mechanics.
- Place the line flowers. Set the tallest stems first to fix the height and outline. Keep them within the 1.5 to 2 times rule.
- Add the focal flowers. Place 3 or 5 large blooms, working from the center outward. Vary their heights a little so they do not form a flat row.
- Fill with filler. Tuck smaller flowers into the gaps. Let a few sprigs sit slightly higher for an airy look.
- Add delicate stems last. Thin, fragile flowers break easily, so they go in at the end.
- Turn and check. Rotate the vase and look from every side. Fill holes with greenery, then top up the water.
WVU Extension follows this same order: greenery first, then line flowers, then focal flowers, then smaller blooms and filler, with delicate flowers last. Step back often. It is easier to judge balance from a few feet away.
Beginner Formula for a First Vase
If you are not sure what to buy, try this simple mix for a medium vase: 3 focal flowers, 5 line or spike flowers, 5 to 7 stems of filler and a generous handful of greenery. Stay with two or three colors. This formula works with almost any mix of seasonal blooms.
How to Make a Hand-Tied Spiral Bouquet

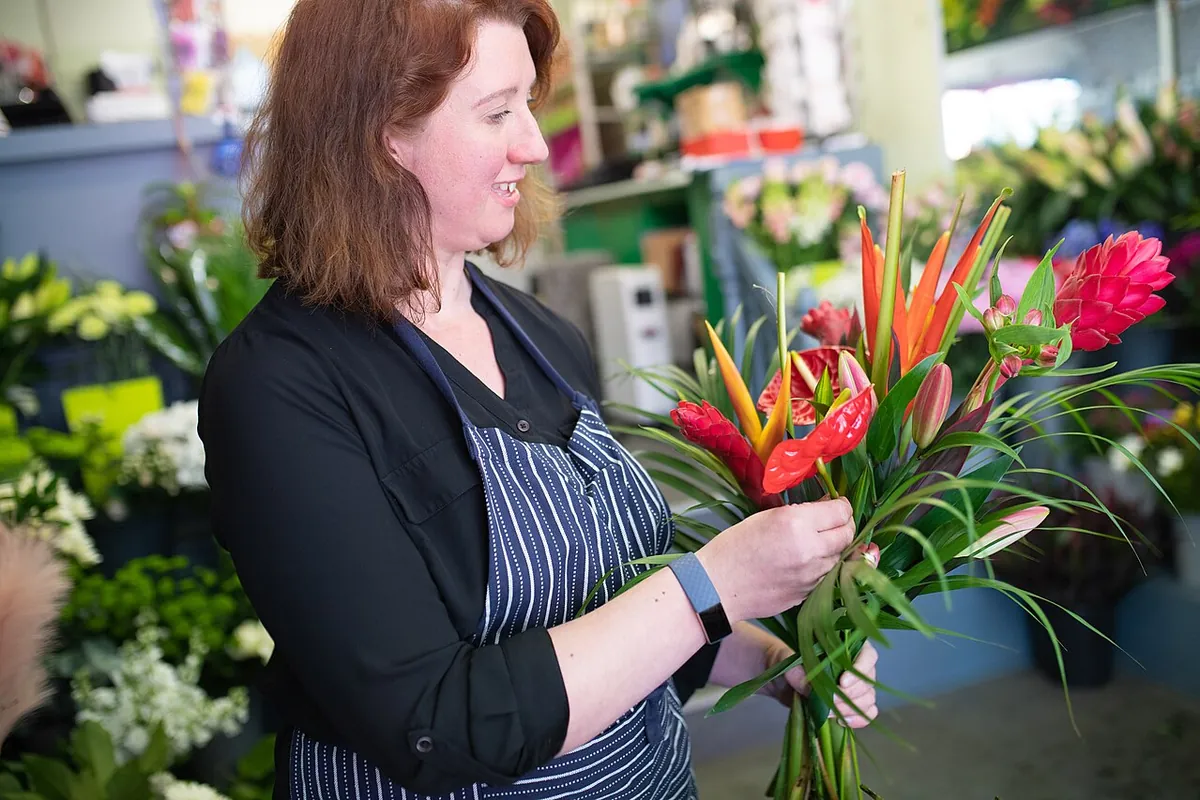
A hand-tied bouquet is arranged in your hand rather than in a vase. Florists use the spiral method because the angled stems fan out below the tie. The bouquet holds its shape, sits neatly in a vase and can even stand upright on its own.
Before You Start
Condition all of your flowers, then strip every leaf from the lower half to two-thirds of each stem. Bare stems slide past each other easily and keep the vase water clean. Lay your flowers out on a table, grouped by type, so you can reach them quickly.
Spiral Bouquet Steps
- Start with one strong stem. Hold a focal flower loosely in your non-dominant hand at the point where you want the tie to sit. This is the binding point.
- Add stems at a diagonal. Lay the next stem across the first so the head leans one way and the stem end points the other way.
- Keep every stem at the same angle. Each new stem crosses in front of the last at the same diagonal. Do not let any stem cross the other way.
- Turn the bunch. After every few stems, give the bouquet a small turn in your hand. Keep adding and turning so the stems spiral evenly.
- Check the shape. Look at the bouquet in a mirror or from above. Aim for a gentle dome with focal flowers spread around it.
- Tie it off. Wrap twine, raffia or floral tape tightly around the binding point several times and knot it.
- Trim the stems. Cut all stems to the same length so the bouquet can stand. WVU Extension also recommends equal stem length for wrapped bouquets.
Tips for a Neater Spiral
- Hold the bouquet loosely. A tight grip snaps stems and makes the spiral hard to turn.
- If the angle goes wrong, pull out the stem and add it again. It is much easier to fix early.
- Start with fewer than 15 stems. Larger bouquets are harder to hold until you have the knack.
- Keep the bouquet in water as soon as it is tied. Recut the stems before it goes in the vase.
Seasonal Flower Choices for Arrangements

Seasonal flowers are fresher, cheaper and easier to find. They also make your arrangements feel connected to the time of year. Here are reliable choices for each season.
| Season | Focal flowers | Line and filler | Greenery |
|---|---|---|---|
| Spring | Tulips, ranunculus, peonies (late spring) | Snapdragons, stock, lilac, sweet peas | Pussy willow, flowering branches |
| Summer | Dahlias, sunflowers, zinnias, lilies | Larkspur, cosmos, yarrow, celosia | Mint, basil, hosta leaves |
| Fall | Dahlias, chrysanthemums, sunflowers | Asters, celosia, ornamental grasses | Seed heads, berried branches, eucalyptus |
| Winter | Amaryllis, roses, carnations | Waxflower, alstroemeria, hellebores | Pine, cedar, holly, magnolia leaves |
Availability depends on your climate and local growers. Winter choices are often store-bought or forced indoors.
Spring
Spring arrangements feel light and fresh. Ranunculus adds layered, rose-like heads, while tulips bring clean lines and movement. Cut flowering branches such as forsythia or cherry make easy, dramatic line material.
Summer
Summer is the easiest season for home arrangers, because so many flowers bloom at once. Zinnias, dahlias, sunflowers and cosmos all give long vase life when picked young. Velvety celosia works as a bold filler or accent and dries well too.
Fall
Fall designs lean on warm, rich colors and texture. Use garden mums and late dahlias as focal flowers, then add grasses, seed heads and berried stems for a rustic look.
Winter
Winter arrangements rely on evergreens and long-lasting blooms. A few stems of amaryllis make an instant centerpiece. Carnations and alstroemeria are inexpensive, easy to find and last well in a vase. For more ideas across the year, see our guide to types of flowers.
How to Make Your Flower Arrangement Last Longer
Good care can double the life of a bouquet. Penn State Extension notes that fresh flowers can last one to two weeks, sometimes longer, depending on the variety. These habits make the biggest difference.
Start With a Clean Vase
Bacteria from old flowers stay in dirty vases and clog new stems. Wash vases in hot, soapy water. To disinfect, Penn State Extension suggests 1 part household bleach to 9 parts water, followed by a thorough rinse.
Use Flower Food
Commercial flower food contains three things: a sugar to feed the flowers, an acidifier to help water move up the stem, and a biocide to slow bacteria. University of Illinois Extension recommends diluting it exactly as the package directs. Penn State Extension adds that commercial products work better than homemade mixes.
Change the Water and Recut Stems
Check the water level every day and top it up. Change the water completely every few days, ideally every two to three, adding fresh flower food each time. Recut the stems at the same time so they stay open and keep drinking.
Keep Flowers Cool and Away From Fruit
Heat speeds up aging. Keep arrangements out of direct sun and away from heaters, vents, stoves and drafts. A cool room overnight helps too.
Fruit is the hidden problem. Ripening fruits such as apples and bananas give off ethylene gas, a plant hormone that speeds up aging and can cause petals to drop. University of Illinois Extension advises keeping bouquets away from ripening fruit, so move your vase off the kitchen counter and away from the fruit bowl.
Remove Fading Flowers
Pull out any flower that wilts or browns as soon as you see it. Dying blooms foul the water and release ethylene that can affect the stems around them. You can often rearrange the survivors into a smaller vase for a few more days of color.
Common Flower Arranging Mistakes to Avoid
Most beginner problems have simple fixes. Watch for these:
- Skipping conditioning: flowers that go straight from the store wrap into a vase wilt fast. Always recut and let them drink first.
- Leaving leaves underwater: this is the top cause of cloudy, smelly water and short vase life.
- Cutting stems too short: measure against the vase and trim gradually. A short stem cannot be fixed.
- Wrong proportion: flowers too tall look top-heavy, and flowers too short look lost. Aim for 1.5 to 2 times the vase height.
- Overstuffing the vase: crowded stems crush each other and block airflow. Leave a little space so each bloom can show.
- Even numbers and straight rows: place focal flowers in odd groups at different heights.
- Too many colors: start with two or three colors plus green.
- Placing the vase in a bad spot: sunny windows, heaters and fruit bowls all shorten vase life.
Flower Arranging for Beginners FAQs
What flowers are easiest for beginners to arrange?
Alstroemeria, carnations, chrysanthemums, zinnias and spray roses are forgiving choices. They have sturdy stems, last a long time in water and come in many colors. Pair them with simple greenery such as eucalyptus or ruscus. A single type of flower in one color, grouped loosely in a vase, also looks polished with very little effort.
How tall should a flower arrangement be compared to the vase?
A common rule of thumb is to make the arrangement about 1.5 to 2 times the height of the vase. Another way to think about it is that the vase forms about one-third of the total height and the flowers form two-thirds. Low bowls suit wide, short designs, while tall vases suit tall, upright ones.
Why do you cut flower stems at an angle?
An angled cut exposes more of the stem to water, so the flower can drink more easily. It also stops the stem end from sitting flat against the bottom of the vase, which can block water uptake. Use a sharp, clean blade so you slice the stem rather than crushing it.
What can I use instead of floral foam?
Try a pin frog (kenzan), a cage frog, crumpled chicken wire or a tape grid across the top of the vase. You can also criss-cross sturdy greenery stems to form a natural grid. These options are reusable, keep stems in clean water and avoid the microplastic waste linked to foam.
How often should I change the water in a flower arrangement?
Top up the water every day and change it completely every two to three days. Add a fresh dose of flower food with each change. Recut the stems at the same time to remove any blocked ends. Clean water slows bacteria, which is one of the main reasons cut flowers wilt early.
Why should cut flowers be kept away from fruit?
Ripening fruits such as apples and bananas give off ethylene gas. This plant hormone speeds up aging in many cut flowers and can cause wilting, yellowing or dropped petals. Keep your arrangement away from the fruit bowl and out of the kitchen if possible. Store flowers apart from produce if you refrigerate them overnight.
Do I need flower food, or is plain water fine?
Plain water works, but flower food usually makes blooms last longer. Commercial flower food contains sugar to feed the flowers, an acidifier to help water move up the stem and a biocide to slow bacteria. Mix it at the strength shown on the packet, since too much or too little reduces its benefit.
Related flower guides
More guides you might enjoy.


